All levels
|
3 hours 37 min
|
01:54
|
|
04:17
|
|
11:42
|
|
10:09
|
|
15:17
|
|
07:30
|
|
10:25
|
|
21:27
|
|
16:24
|
|
16:03
|
|
10:38
|
|
16:09
|
|
10:12
|
|
08:21
|
|
11:40
|
|
08:53
|
|
13:10
|
|
14:48
|
|
08:01
|
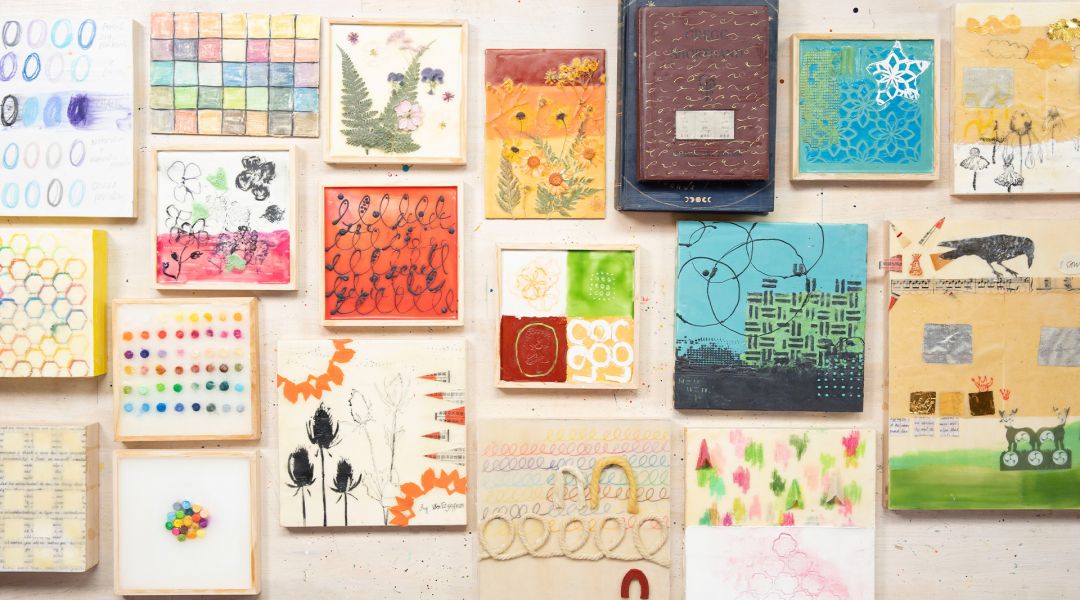
Encaustic, an ancient artistic technique, involves painting with hot wax to create tremendous textural possibilities. Lisa Solomon, a multi-disciplinary artist and educator, guides you through an exploration of this unique medium. The wax, sometimes infused with colored pigments, is applied to surfaces, typically wooden panels, and manipulated using various tools. During the process, experiment with techniques such as embedding, mark making, layering, carving, and incorporating natural and 3D elements. The resulting encaustic paintings often exhibit a lustrous and translucent quality, providing a means for creative expression through the fusion of wax, pigments, and heat.
Learn how to:
Here’s what you’ll need:
Safety Materials:
- Gloves or Barrier Cream
- Fire Extinguisher
- Container of water, in case paper or something catches on fire or for burns
- Safety glasses if you are doing a lot of pouring or splashing of materials
- Respirator and/or work in ventilated room
- Hair tie to keep hair off of your face, well-fitted sleeves
- Tip: keep palette 200 F/93 C or lower
Encaustic Materials:
- Encaustic Starter Kit
- Encaustic medium: Lisa recommends R&F brand, or make your own with 9 parts wax to 2 parts damar resin
- Plain beeswax or paraffin wax: in a brick or preferably pellets
- Hot surface, such as a griddle, skillet, etc.
- Flat Thermometer for checking surface temp
- Large drip pan or cookie sheet to protect work surface
- Metal containers to hold encaustic, such as small aluminum baking pans
- Fuse tools: torch, heat gun, or iron (for encaustic use only)
- Encaustic paints: purchase premade colors or add dried oil paint, oil sticks, pigment powder to create colors
- Popsicle sticks for stirring wax
- Bench scraper
- Wax paper
- Hand tools such as wood carving/linocut tools, awls, brayer, burnisher, bone folder, pottery tools, metal palette knives with shapes, rolling wheels, tweezers, and a Tjanting (Indonesian batik tool)
- Natural bristle brushes: Hake brushes or hardware brushes (for encaustic use only)
- Substrate: stiff, non bendable surfaces are better, such as encaustic board, wood panels, plywood, cradled panels (with or without lip), thick non-coated paper, very thick canvas, etc.
- Paper towels - rags can get wax filled and not useful quickly
- Slick Wax for cleaning
Art materials:
- Watercolor pencils, chalk pastels, india ink, pencils, Sharpies, etc.
- Linseed oil as a release for stamps and burnishing surfaces
- Gesso
- Matte medium or PVA glue
- Scissors, utility knife and cutting mat
- Hand carved stamps - check out Lisa’s Carve a Rubber Stamp Kit class
- Silicone molds
- Other items to add to your composition: stamps, pigment ink pads, stencils, carbon papers, gold leaf, tissue paper, ephemera, laser prints for image transfers, parchment/wax paper, painters/washi tape, textiles, ribbon, silcone molds for pouring 3D wax items, dried plants, old hardcover books, rope or other fibers, etc.
Downloads:
- Set up a home encaustic studio
- Use pigments to color your encaustic medium
- Play with different techniques to explore the medium
- Combine other art materials such as paints and 3D objects with encaustic wax


Member Gallery
Browse members' projects from this class and share your own work! Learn how to take great photos here.
Load More
Transcript
Class PDF
Explorations in Encaustic: A Daily Practice Reviews
21 users recommended this class to a friend
Sandi H
Lisa gave extensive and thorough demonstrations of this ancient artistic technique. I was hoping to see an example of heavy drips of opaque, white wax on vintage-designed, nostalgic altered art compositions. There was so much brushing in most of the projects that Lisa shared that it was very similar to simple decoupage. Despite that, the series was still interesting.
More than 3 months ago
Catherine G
What a fantastic course! This definitely gives me a bunch of really great ideas on how to create art. I really loved the image transfer sections. I love the idea of being able to print something to paper and then transferring it to the wax. Thanks for the course!
More than 3 months ago


