All levels
|
1 hour 11 min
|
00:49
|
|
03:27
|
|
16:03
|
|
11:12
|
|
10:28
|
|
22:22
|
|
07:09
|

Taught by e bond
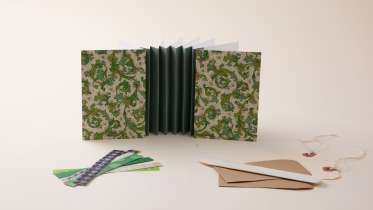
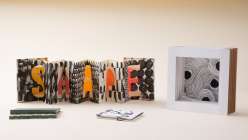
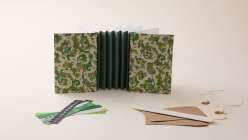
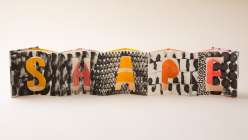
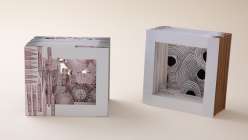
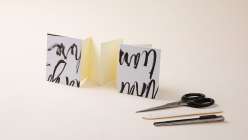
Accordion books have been around for centuries but are often overlooked. This class explores how something as simple and unassuming as an accordion book can transform into three dramatic, sculptural artists books. The accordion form is deceptively simple, but is the foundation for all kinds of innovative, modern structures. Learn a simple accordion as the foundation, then explore how to evolve the form in three different ways: as a flag book, a tunnel book, and a carousel book. Break through the practical purpose of basic accordion form and create something unique and beautiful that elevates simplicity into art.
Learn how to:
Here’s what you’ll need:
- Long strips of paper cut from a 24" drawing pad
- Davey board for book covers
- Cardstock
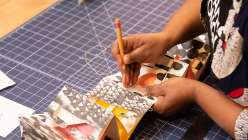
- Variety of decorated paper, including paper with images (old calendar, magazines, photographs) in different weights
- Scissors or X-Acto knife
- Mat knife
- Cutting surface
- Piercing tool, such as an awl or push pin
- Glue stick or double sided tape / Tombow adhesive
- PVA glue with brush or roller
- Paper clips or binder clips
- Bone folder
- Embroidery needle
- Linen thread or embroidery floss
- Ruler (preferably 24"or longer) and a triangle or square (optional)
- Pencil
For the Carousel Book:
- Layer 1:
- Two sheets of paper cut to 22" x 5"
- Folded into 2-7/8" wide pages
- Layer 2:
- One sheet of paper cut to 22-3/4" x 5"
- One sheet of paper cut to 19-1/2" x 5"
- Mark first fold at 13" on both sheets
- Folded into 3-1/4" wide pages
- Layer 3:
- One piece of paper cut to 24" x 5"
- One piece of paper cut to 16" x 5"
- Mark first fold at 16" on the 24" sheet
- Folded into 4" wide pages
Downloads:
- Make an accordion book
- Make a flag book
- Make a tunnel book
- Make a carousel book

Member Gallery
Browse members' projects from this class and share your own work! Learn how to take great photos here.
Load More
Transcript
Notes
Your timecode tags and notes for this section
Class PDF
Accordion Book as Art Form Reviews
248 users recommended this class to a friend

Alison PICKARD
What an inspiring class. From the simplest form to the much, much more complex. There are years of exploration here. Many thanks for your clear teaching with so many helpful tips.
May 9, 2026

Cheryl White
I have watched this series before and I have deepened my understanding. I love E. Bond's work.
More than 3 months ago

Lawrene Solberg
Wow. What a creative idea for those of us who love journaling. I have 5 daughters that have started journaling their life's adventures and I cannot wait to teach them these methods. Our instructor here is one of the best in the Creative Bug tutorials. She thoroughly explains every detail in making the according booklets and it is very easy to follow along. I highly recommend this class. Loved it!!!!
More than 3 months ago
Related Classes