
Intermediate
|
31 min 6 sec
|
31:06
|
Cabled Afghan Knit Along
Week 1:
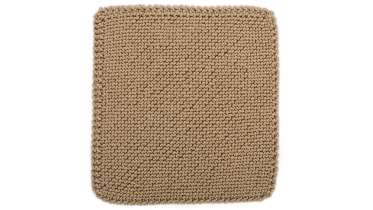
BLOCK A - Bias Garter Stitch Square
In this first week, you’ll learn how to make a garter stitch block that is knit on the bias. You will make 10 of these simple squares, which are used several times in the afghan to separate the more ornate cabled squares.

Week 2:
BLOCK B - Basic Cables Square
For your first cabled square, we'll keep things simple: you will learn how to knit basic cables using an easy 2 over 2 left cross. You will also learn how to do a cable cast on, read a chart, and read the stitches on your needles.
Week 3:
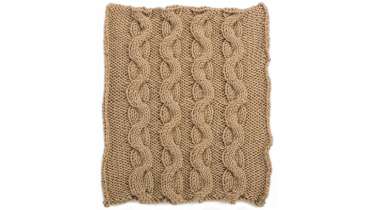
BLOCK C - Snake Cables Square
Now that you've covered the basics, you're ready to learn how to make a slightly more complicated cable. The 3 over 3 left crosses and right crosses featured in this square snake back and forth over each other to make a complex design. You'll also learn tricks for keeping track of rows.
Week 4:
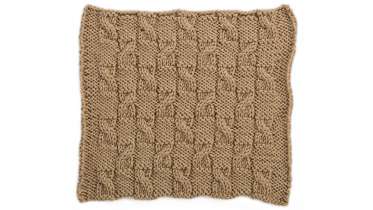
BLOCK D - Checkerboard Cables Square
Instead of working in traditional cabled columns this week, you’ll learn how to work offset cables, which are staggered like the squares of a checkerboard.
Week 5:
BLOCK E - Stockinette Cables Square
Learn how to work cables against a Stockinette Stitch background, which creates a lush overall pattern. Edie also shares a trick for working cables without a cable needle.
Week 6:
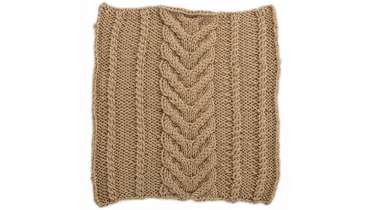
BLOCK F - Horseshoe Panel with Twists Square
This stitch pattern uses a combination of several simple cables to form an ornate central panel, flanked by skinny cabled twists. Edie also shares a tip for using stitch markers to keep track of your cable pattern.
Week 7:
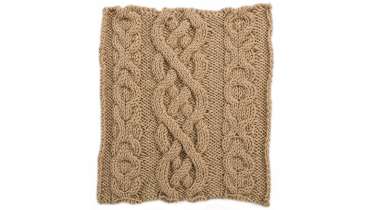
BLOCK G - XO Panels and Ensign's Braid Square
This block features multiple cables that come together to create an ornate design. Edie shares strategies for working several complex cables at the same time and provides tips for using stitch markers to keep track of where you are.
Week 8:
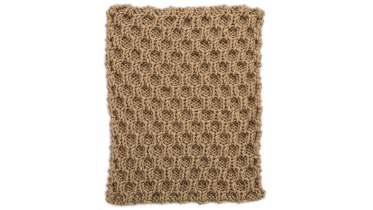
BLOCK H - Honeycomb Trellis Square
This block features a fun honeycomb pattern, which creates an allover texture.
Week 9:
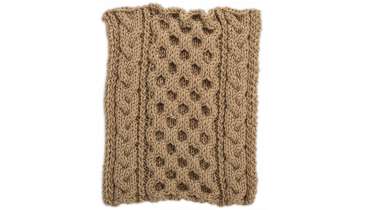
BLOCK I - Honeycomb and Braided Cables Square
This complex block design combines a honeycomb stitch pattern with k1-tbl cables and braided cables. Edie also shares a tip for keeping track of rows using a strand of knotted scrap yarn.
Week 10:
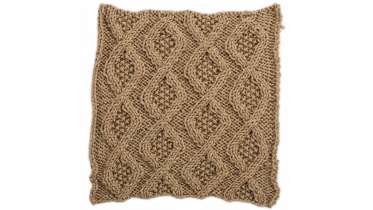
BLOCK J - Seed Stitch Diamonds Square
This week’s cable block combines cables that you already know, but with the added challenge of including Seed Stitch between the cables.
Week 11:
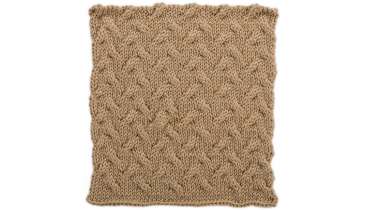
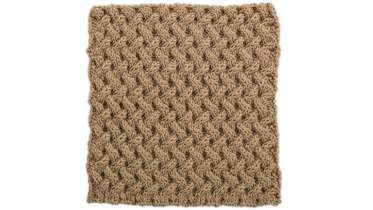
BLOCK K - Lattice Cables Square
In this final block, the cables weave around each other creating a highly textured allover pattern. Edie shares tips and tricks for staying focused while working a "non-intuitive" stitch pattern, and teaches more tricks for keeping track of rows.

Now Playing
Week 12:
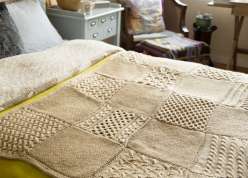
Putting it All Together
Now that you've finished all of your squares, you're ready to finish the afghan. In this final class, Edie demonstrates how to block the squares and seam them together.

Taught by Edie Eckman
Start Free Trial or
Buy For $19.95
Now that you've finished all of your squares, you're ready to finish the afghan. In this final class, Edie demonstrates how to block the squares and seam them together.
Member Gallery
Browse members' projects from this class and share your own work! Learn how to take great photos here.
Load More
Transcript
Putting it All Together Reviews
6 users recommended this class to a friend
Related Classes