
All levels
|
10 min 32 sec
|
02:02
|
|
08:30
|

Taught by Courtney Cerruti
Start Free Trial or
Buy For $9.95
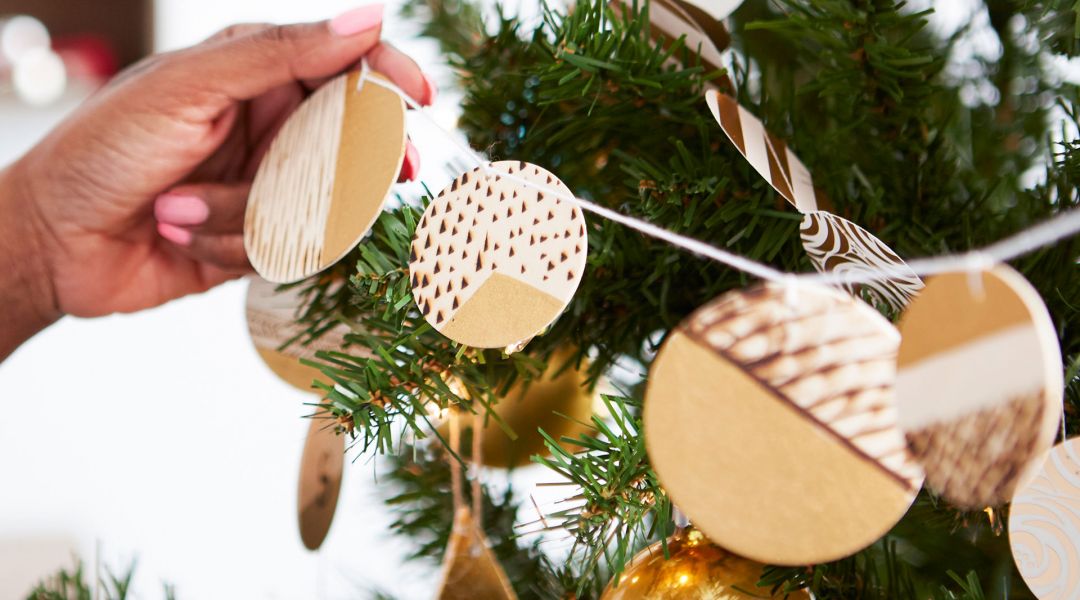
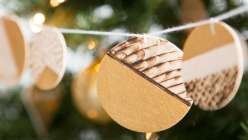
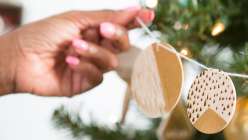
Courtney Cerruti takes an innovative approach to a traditional decoration with this decorative wood-burning project. In this class, you will learn how to wield a wood-burning tool to create designs and stamp letters on wooden rounds. Follow along as Courtney shows you how to add a touch of paint, hammer holes into the rounds and add twine for hanging. With a design on both sides, this wood burned garland is great for hanging in doorways and windows.
Learn how to:
Here’s what you’ll need:
- Small wooden rounds
- Wood burning tool
- Specialty tips for burning tool
- Wood burning alphabet tip set (optional)
- Pliers for changing tips
- Gold craft paint
- Masking tape (optional)
- Small paintbrush
- Hammer and nails
- Embroidery thread
- Scissors
Downloads:
- Burn designs into wooden rounds using different burning tool tips
- Hammer holes into rounds
- Add complementary paint to designs
- String rounds onto embroidery thread for garland
- Learn how to use a wood-burning tool to create designs and stamps letters on wooden rounds
- Detailed supplies list
- Step-by-step expert instruction from artist Courtney Cerruti
- The ability to leave comments, ask questions, and interact with other students


Member Gallery
Browse members' projects from this class and share your own work! Learn how to take great photos here.
Load More
Transcript
Class PDF
Wood Burned Holiday Garland Reviews
124 users recommended this class to a friend

Tracy Louden
Would like to see more tips on how to make the wood burning look even and not scratchy
More than 3 months ago

Jennifer Thomas
Fun! Great ideas! Made it look so easy. Can't wait to try it out!
More than 3 months ago

Deborah Llewelyn
I always enjoy making my own ornaments for Christmas fab ideas here
More than 3 months ago
Related Classes